How To Add The Make An Offer Button To Your Product Page On Shopify

In today’s competitive e-commerce landscape, engaging customers and fostering interactive shopping experiences are crucial for driving sales. By integrating Make An Offer Button into your product pages, you’ll empower your visitors to negotiate and feel more connected to your brand. In this concise tutorial, we’ll walk you through the step-by-step process of adding the “Make an Offer” button to your Shopify store, enabling you to unlock a new realm of customer engagement and boost your conversion rates. Let’s dive in and revolutionize your online business. Now. Let’s get started!

To add the Make An Offer Button to your product page on Shopify, you have to do these steps:
Step 1: Make visible the app on your store
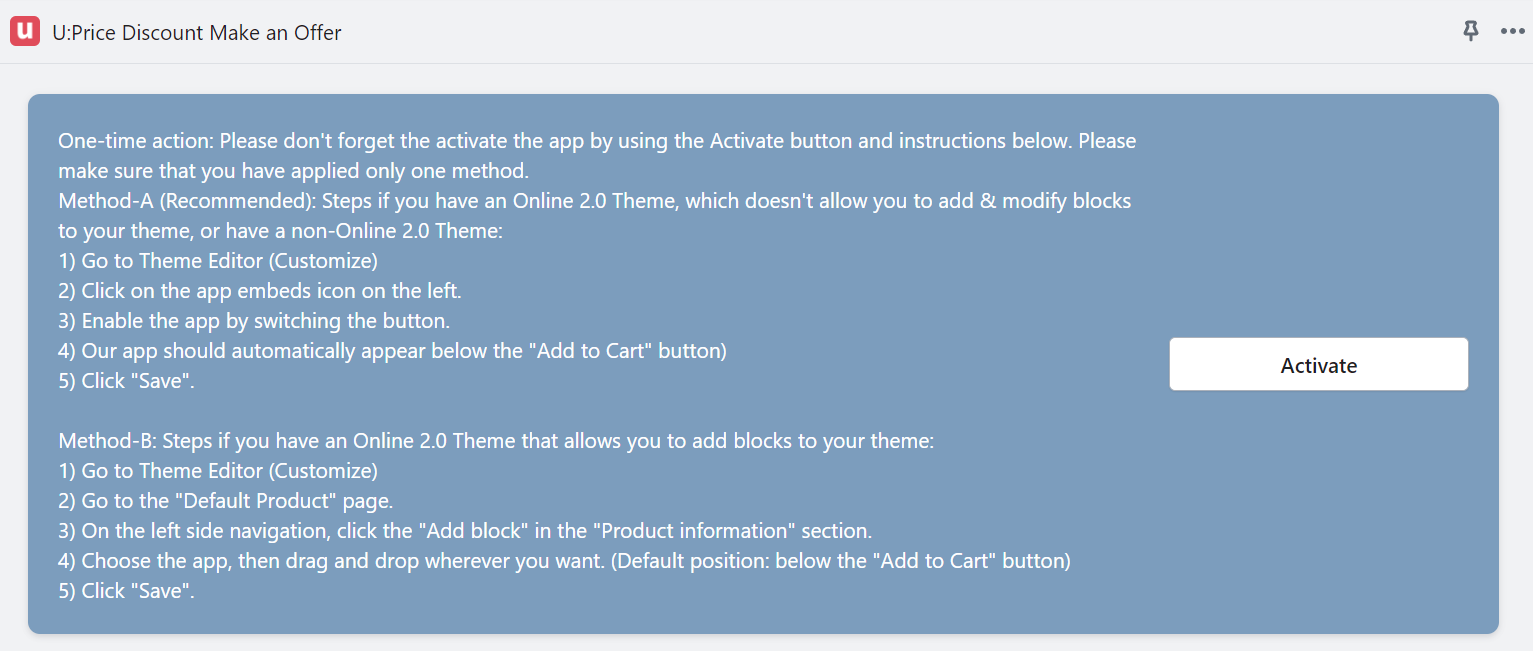
You need to activate the app by using the Activate button. Here are the detailed instructions and please make sure that you have applied only one method.
- Method-A (Recommended): Steps if you have an Online Store 2.0 theme, which doesn’t allow you to add & modify blocks to your theme, or have a non-Online 2.0 Theme.
- Method-B: Steps if you have an Online Store 2.0 theme that allows you to add blocks to your theme.
Step 2: Set up the app
You have the flexibility to use the app depending on your needs. There are 3 different options that you can select while using the app.
- Disable the App
If you would like to deactivate the app from your store, please select this selection. This selection does not mean uninstalling the app from your store but gives you the flexibility to deactivate the app easily and quickly.
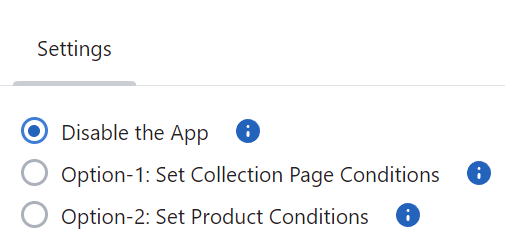
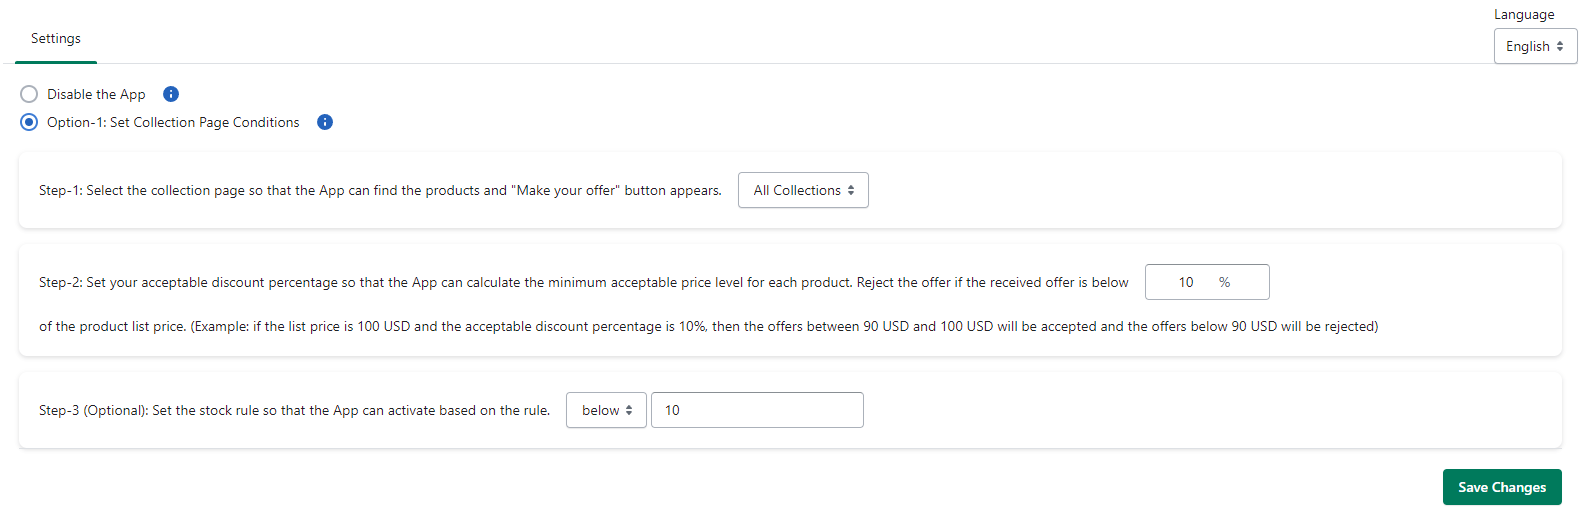
- Option-1: Set Collection Page Conditions
If you would like to activate the “Make your offer” button for products on specific collection pages, please use this selection.
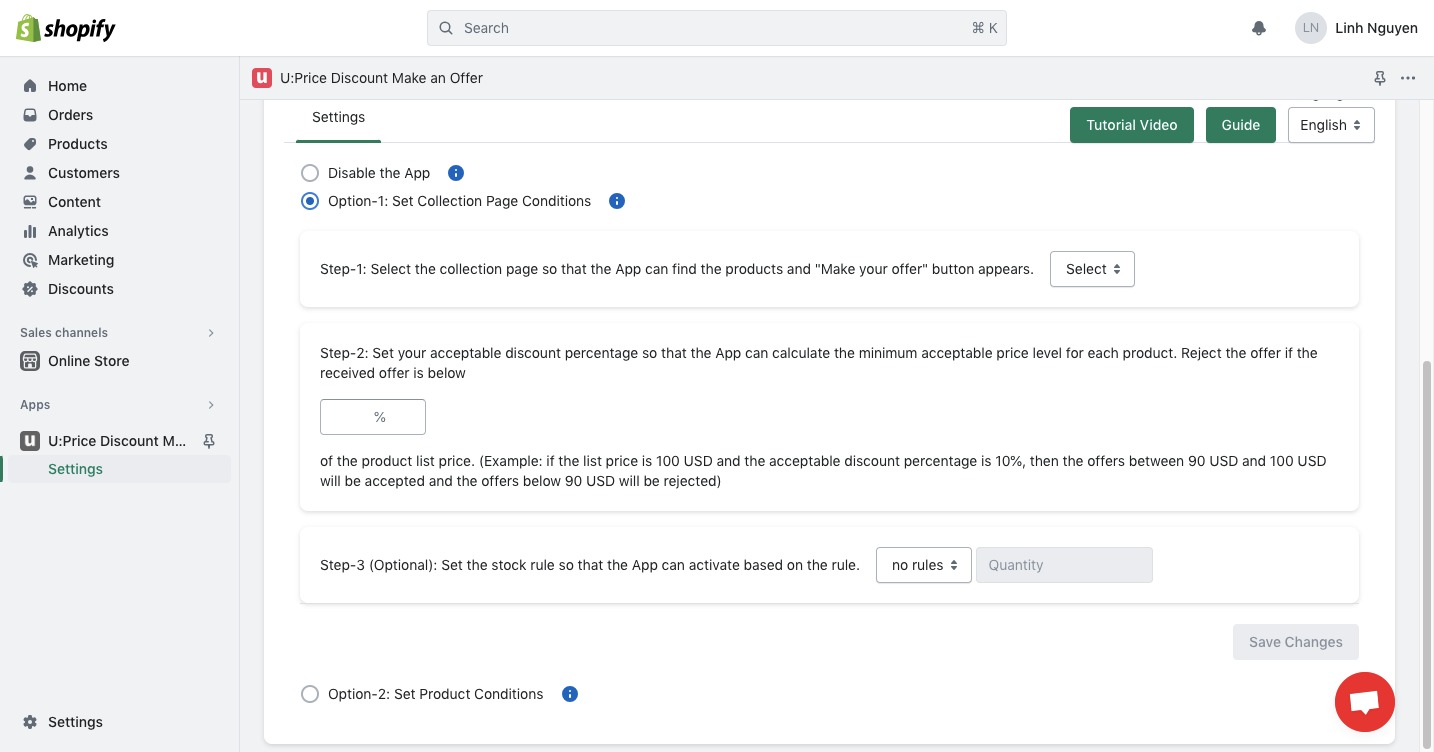
You can define your own rules by setting the conditions below. Please do not forget to click “Save Changes” after you enter the rules.
- Step-1: Select the collection page so that the app can find the products and the “Make your offer” button appears. You will see the collection pages on the dropdown menu and you can select one of them or leave it as All Collections if you want the app to appear throughout the online store.
- Step-2: Set your acceptable discount percentage so that the app can calculate the minimum acceptable price level for each product. You can manually enter the number. The app will Reject the offer if the received offer is below the acceptable price. For example; if the list price is 100 USD and the acceptable discount percentage is 10%, then the proposals between 90 USD and 100 USD will be accepted and the bids below 90 USD will be rejected.
- Step-3 (Optional): Set the stock rule so that the App can activate based on the rule. If you want the activate the app regardless of available stock, then you should leave this selection as “no rules“. In case you need a condition, then you can select the “above” or “below” selection and enter the quantity that you would like to set as a limit.
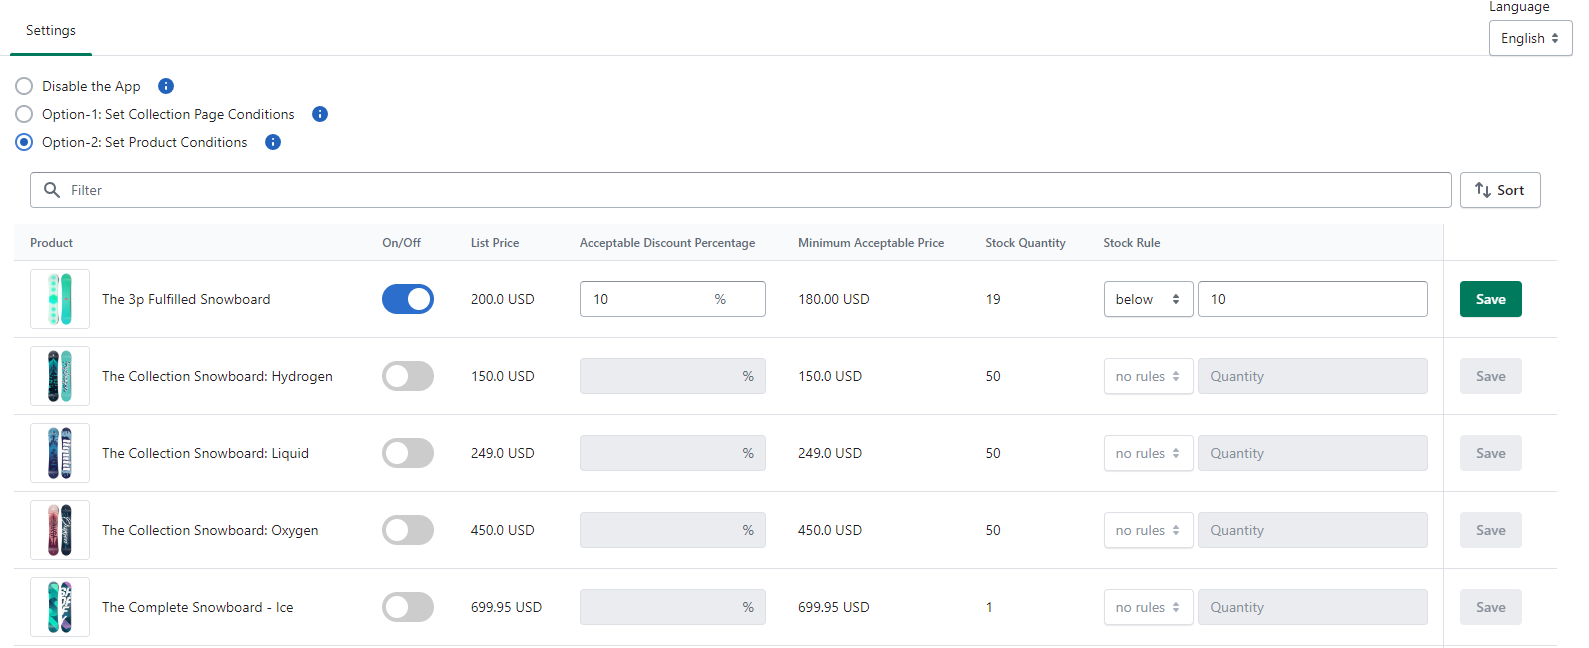
- Option-2: Set Product Conditions
If you would like to activate the “Make your offer” button for singular products, please use this selection. It helps you to set your rules product by product depending on your preference.
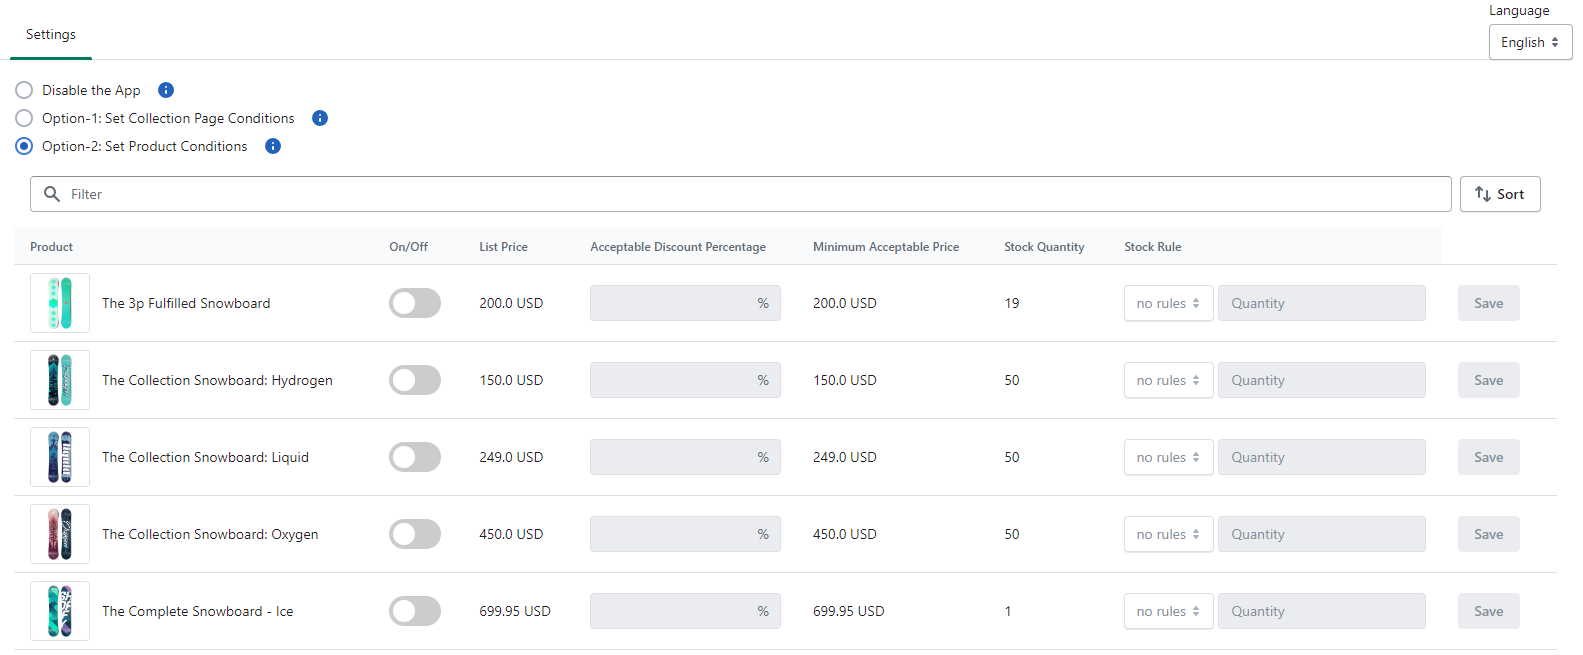
In order to activate the rules for each product, please make sure that the switch button (on/off) is turned into “On“. Then, you will be able to enter your preference for the Acceptable Discount Percentage and Stock Rule (if you require). Please do not forget to click “Save Changes” after you enter the rules.
An acceptable Discount Percentage means that the app can calculate the minimum acceptable price level for each product. The app will Reject the offer if the received request is below the acceptable price. As an example; if the list price is 100 USD and the acceptable discount percentage is 10%, then the offers between 90 USD and 100 USD will be accepted and the offers below 90 USD will be rejected.
Stock Rule means that if you want the activate the app regardless of available stock, then you should leave this selection as “no rules“. In case you need a condition, then you can select the “above” or “below” selection and enter the quantity that you would like to set as a limit.
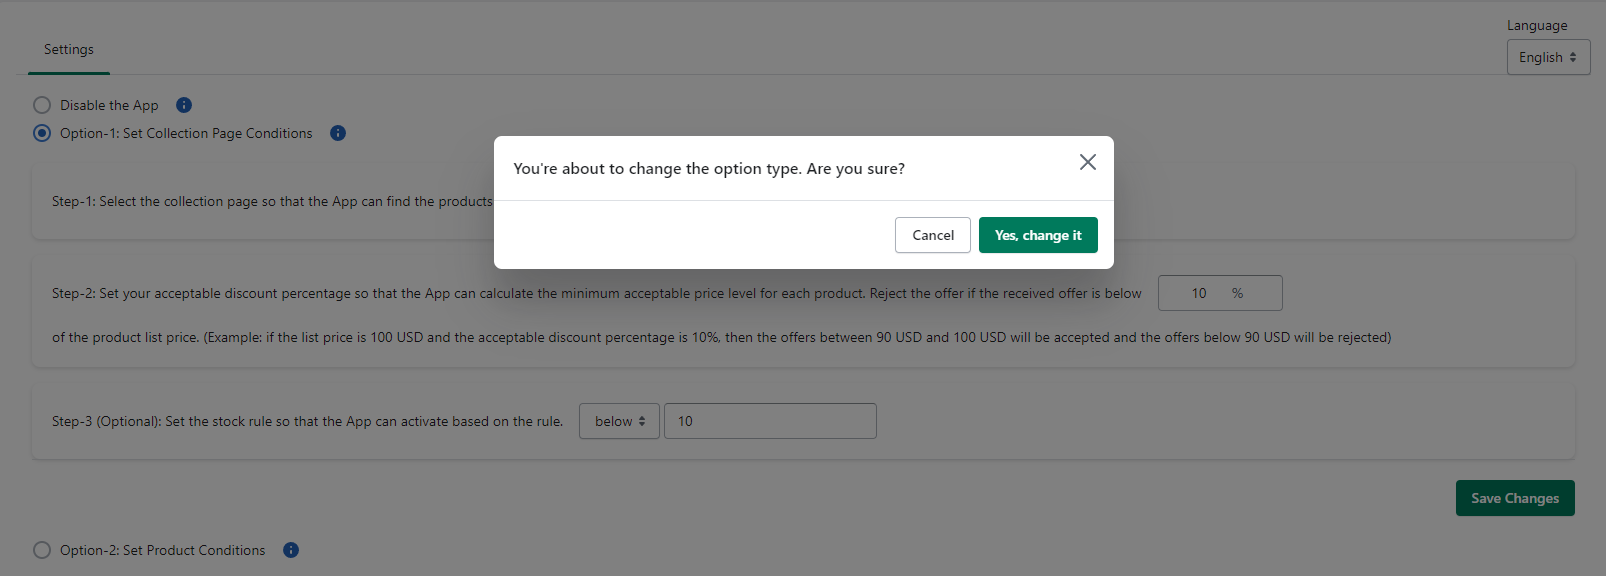
Step 3: Change Between the Options
Please note that every change between the options above triggers a pop-up question to understand that you are aware of the change. If you are confident about changing the option, please press the button called “Yes, change it“.
Conclusion
By following our comprehensive guide, you’ve taken a significant step towards enhancing customer engagement and driving sales. This interactive feature empowers your shoppers to negotiate and feel more involved in their purchasing decisions, fostering a sense of connection with your brand. Remember, in today’s competitive e-commerce world, offering unique and personalized experiences is key to standing out and attracting loyal customers. With the “Make an Offer” button, you’ve opened the door to a new realm of possibilities for your online business, ensuring a brighter and more prosperous future ahead.