How To Deliver By Design Using Shippo App

You are a business owner and you are spending a lot of time processing and shipping orders as well as considering the most reasonable shipping costs. Now, there is the best solution for you. Shippo will help you solve these problems. When using this app, you’re part of a global community of over 100,000 brands and over 85 partners. You’ll find the absolute best rates from top carriers and everything you need for professional shipping in one place. Shippo’s platform gives your business the freedom to work the way you know best while streamlining logistics, saving you both time and money. Let’s learn in detail how to get started in the Shippo web app in this article.
Log into Shopify Apps Store, find the Shippo app, and then Add App. You can install it in an easier way by clicking the Install icon above.

Once the download is complete, you will have to go through the steps to integrate this app into your store. You have to enter your information first and get started.

Step 1. Company Information
After signing in for the first time, you’ll be prompted to enter your company information, including your current store platform, your primary preferred carrier, and average monthly shipment volume.

You’ll be prompted to connect your store platform during the final setup, so don’t worry about remembering your store’s login information at this step. When calculating your monthly shipment volume, the developers recommend providing an average between your highest and lowest volume months. They use this number to ensure you get the best rates.
Step 2: Shipping Preferences
After entering your company details, you’ll be prompted to enter your shipping preferences. These will be your default label, package, and carrier settings that Shippo will use when purchasing labels.

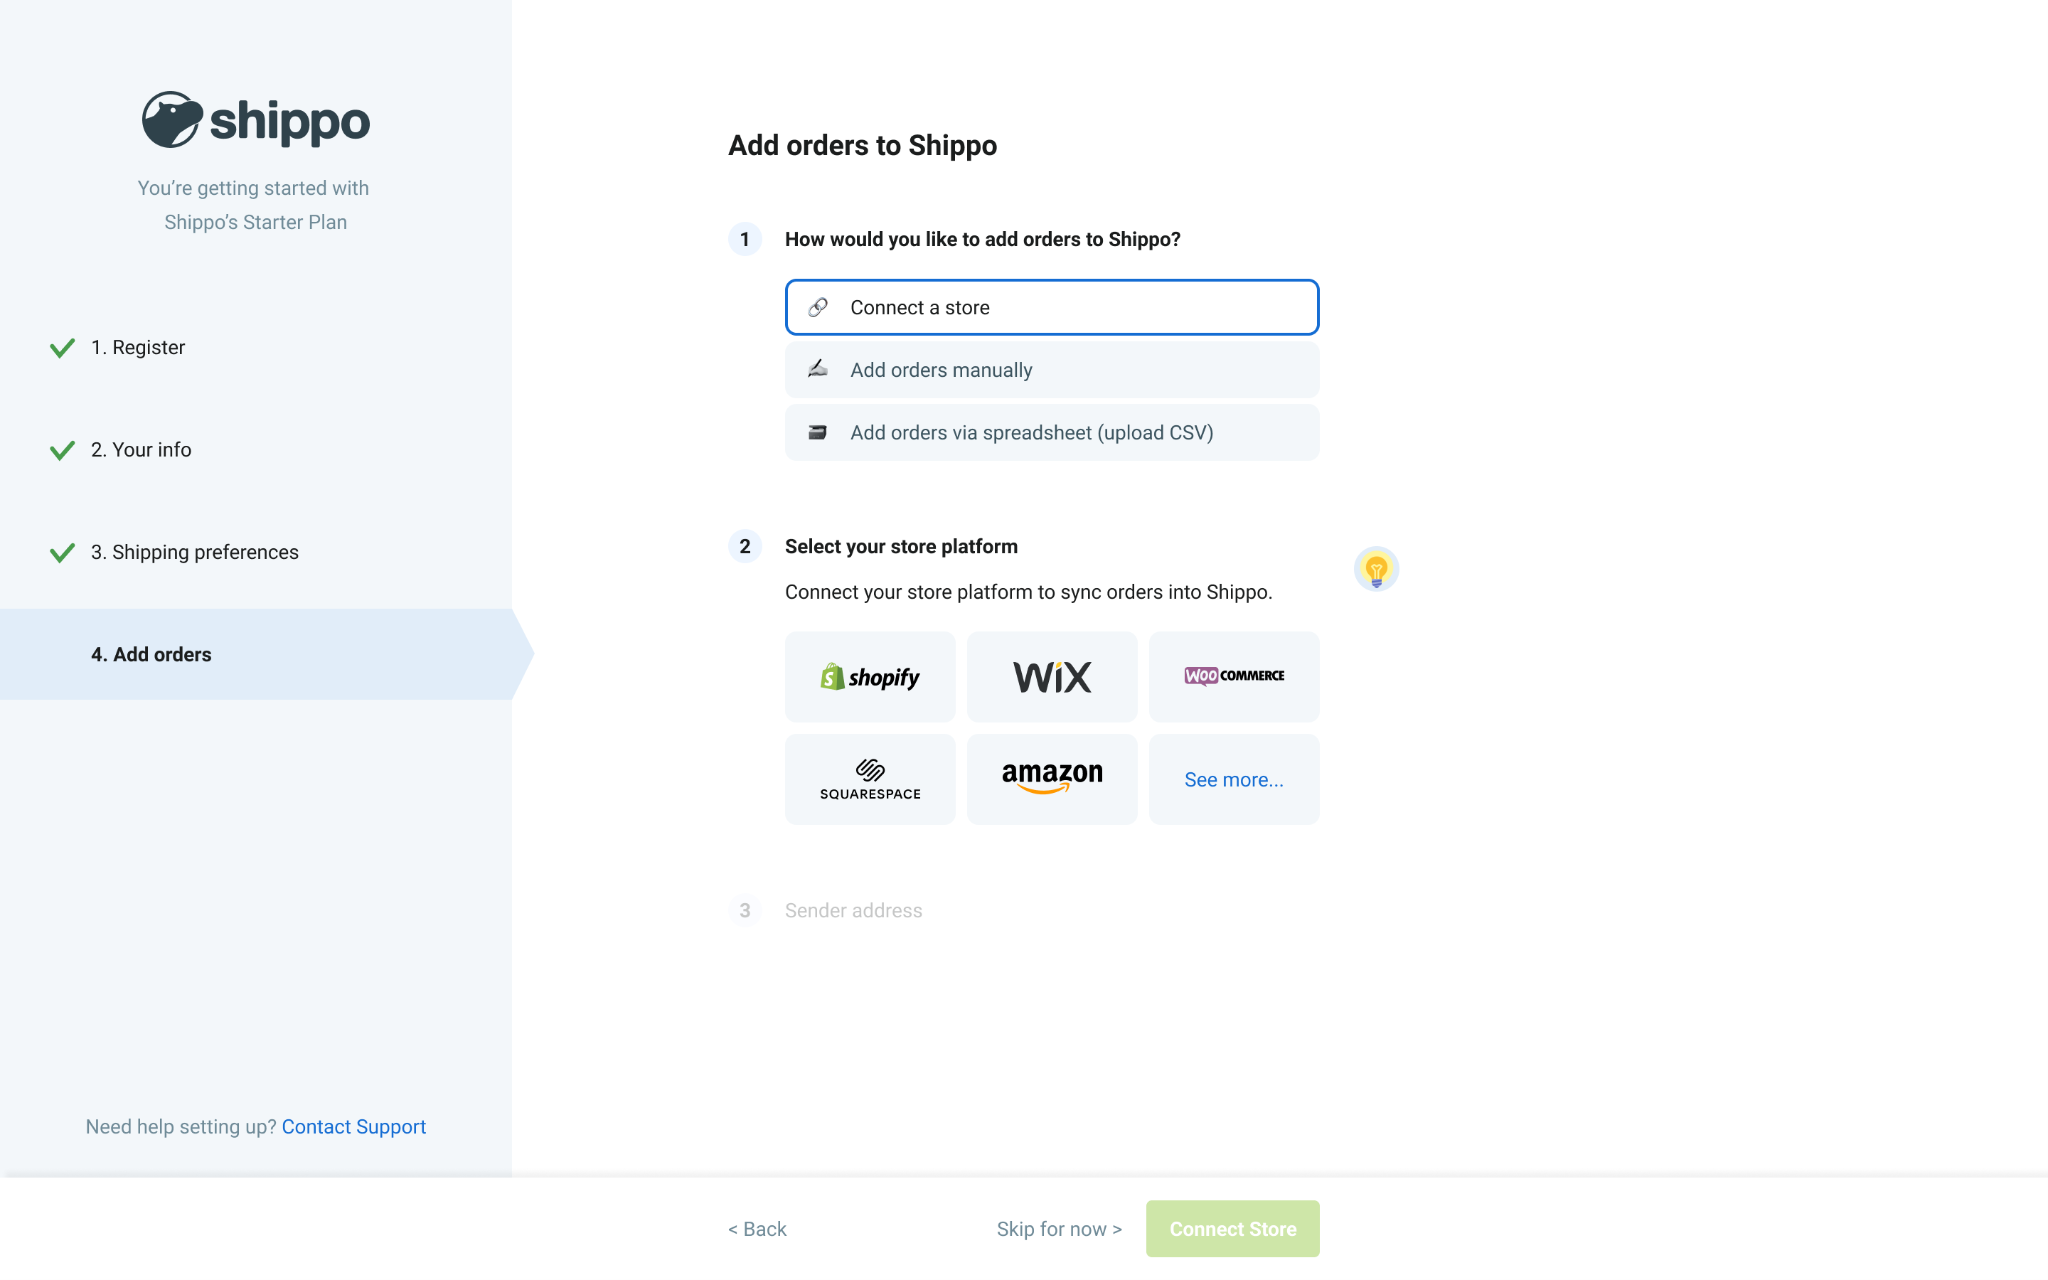
Step 3: Adding Orders
After updating your shipping preferences, it’s time to add orders. If you are selling through one of the Shippo E-commerce Store Integrations, you will be able to connect your store to Shippo in this step. You can also choose to add orders via spreadsheet (CSV file) or just create orders manually as you go: Uploading Orders via CSV
As part of this process, you’ll also be able to enter your sender address. This address will remain your default address but can be updated under the settings tab. And that’s it. The initial setup process is complete.
Step 4: Updating Your Account in Shippo
Once your account setup has been completed, your Shippo Orders page will initially look something like this:
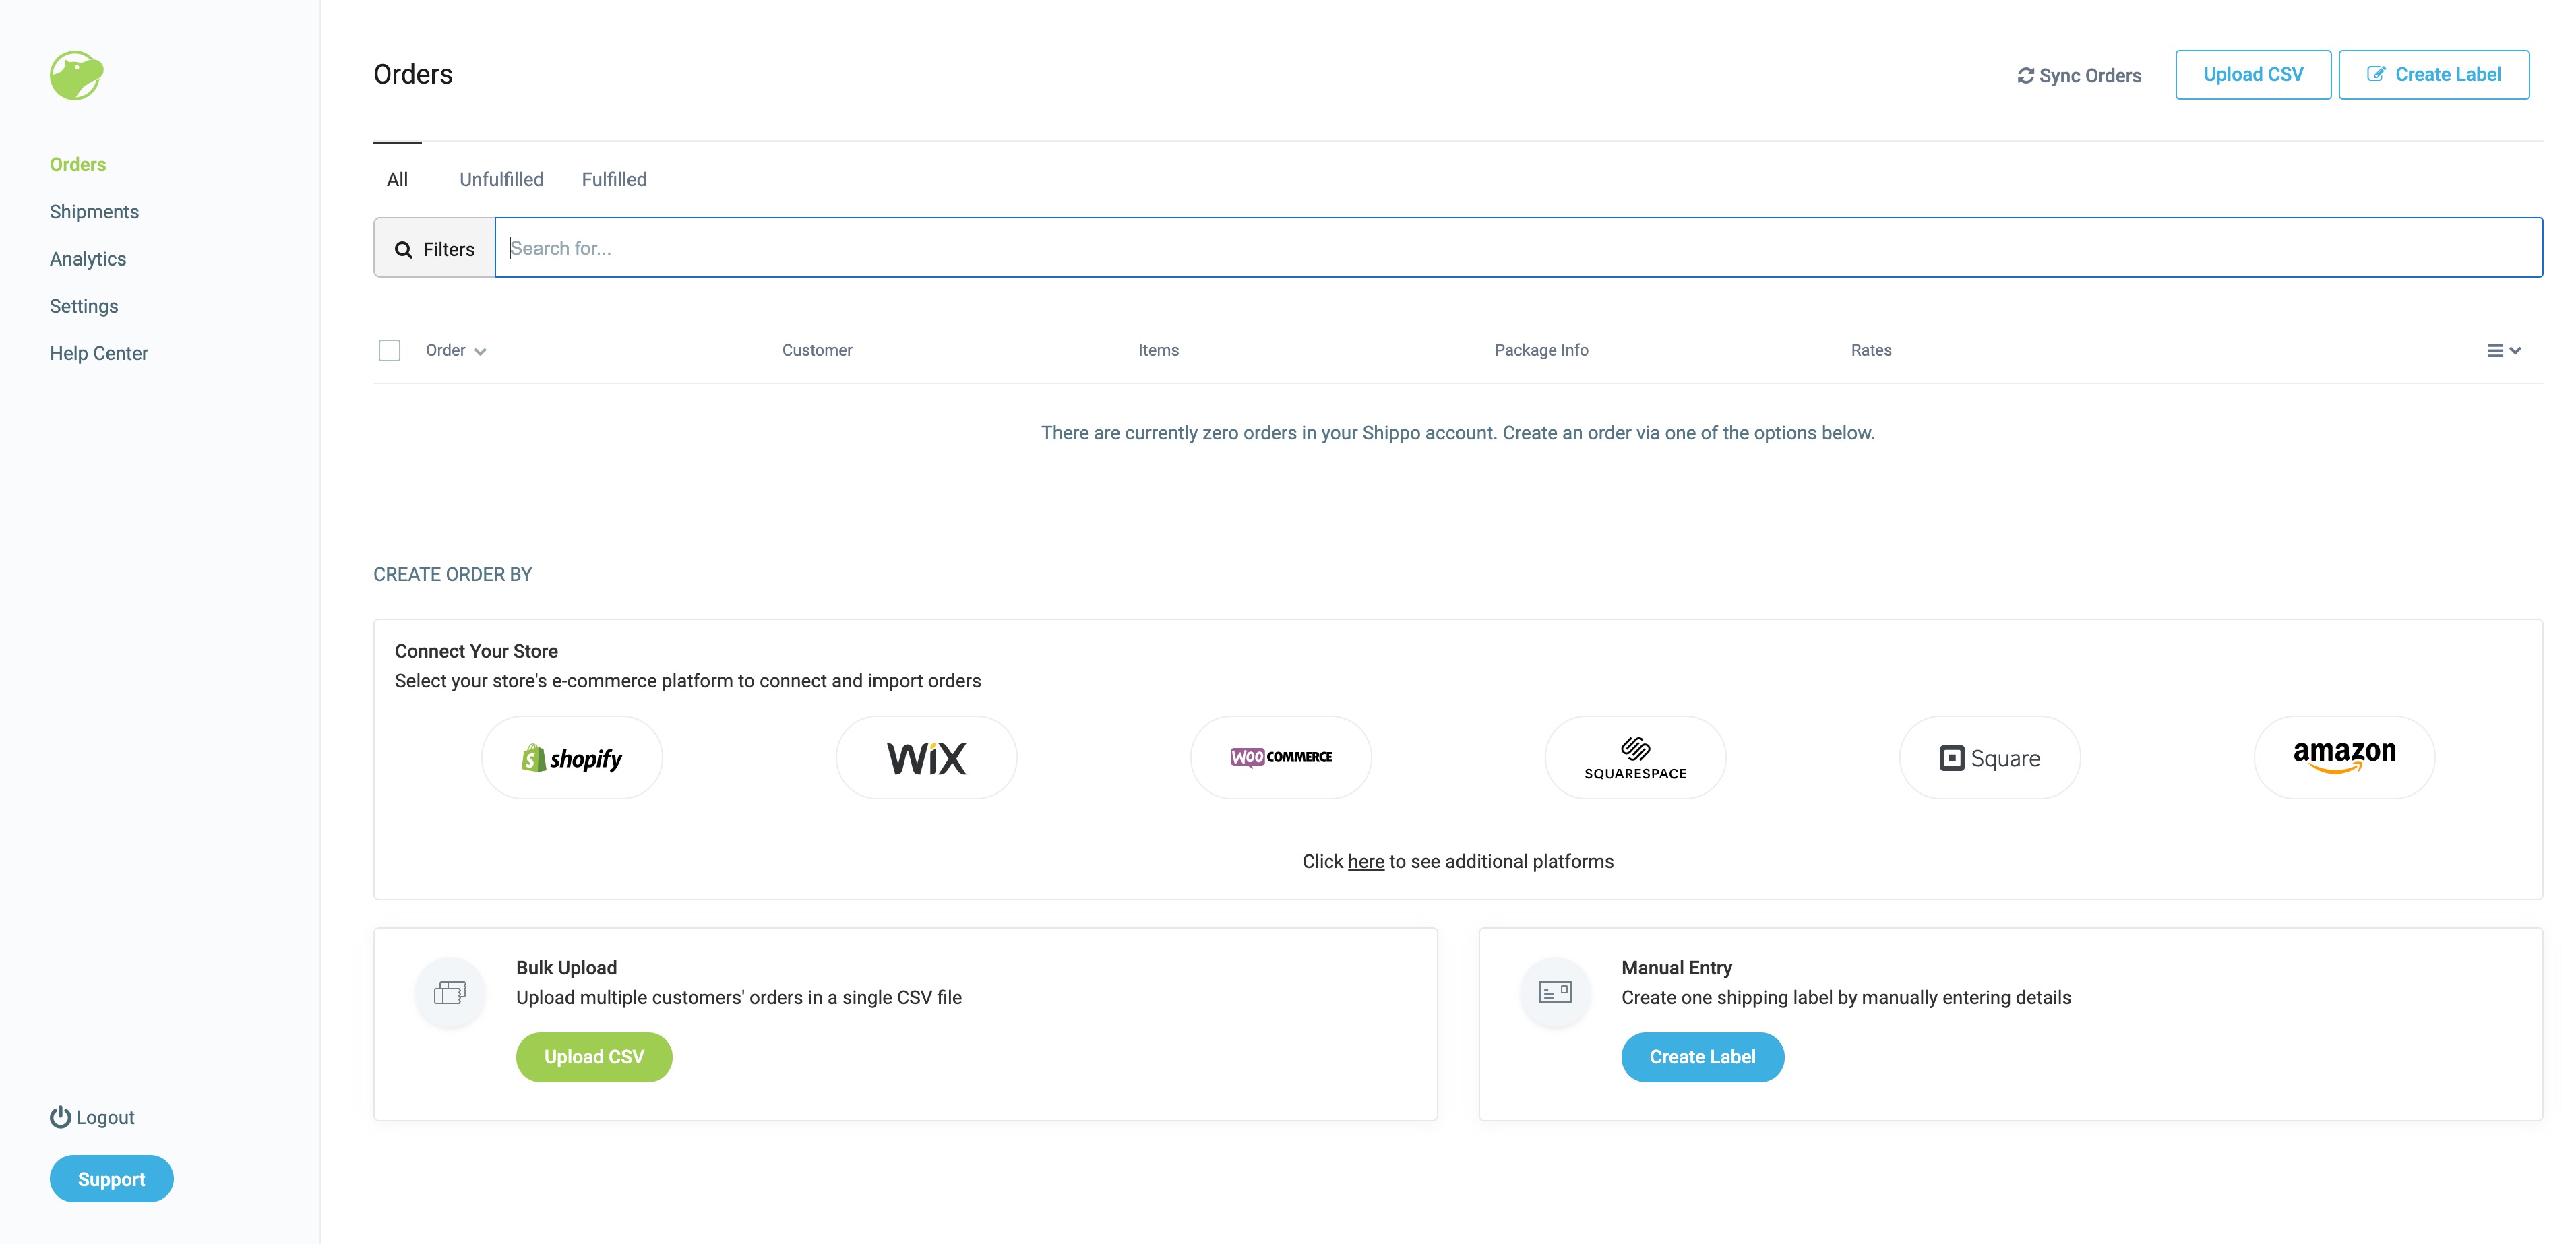
The next step is to update your business address. To update your address, along with other business information, click on the “Settings” tab.
Step 5: Update Billing Information
Once you’ve added your address, you’re ready to set up billing. You’ll need to update this information before shipping your first package. Click to add a credit card, which will be used as your primary payment method. It’s important to note, Shippo runs on a weekly billing cycle for label purchases.
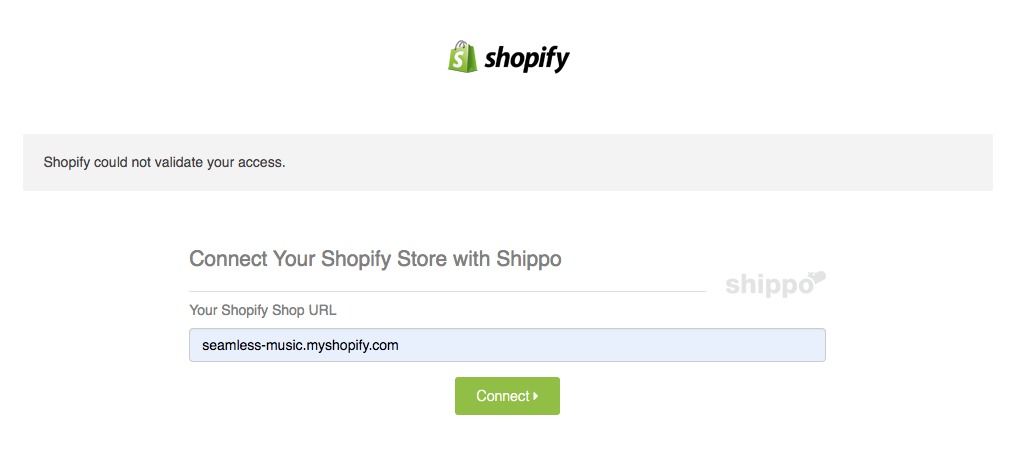
Step 6: Connect Your Store
To get started, click Settings on the left panel of your account. From there, click Stores to connect your e-commerce channel and enter your store details. With each store integration, you’ll be prompted to enter your store credentials and log into those sites externally. Once connected, you’re all set. Your store orders will begin populating under the “Orders” tab.
Step 7: Update Label Settings (Getting Started in Shippo)
You may be printing labels from a variety of formats, so it’s important to understand how to update label settings to accommodate your preferred printing method. Under the “Configurations” header, you’ll find a tab called “Labels”. In this tab, you’ll be able to update label formats and options. Take a quick look at the default settings and double-check if these settings are suitable for your needs. If you need to make label changes in the future, you can do that here.

Step 8: Create a New Label
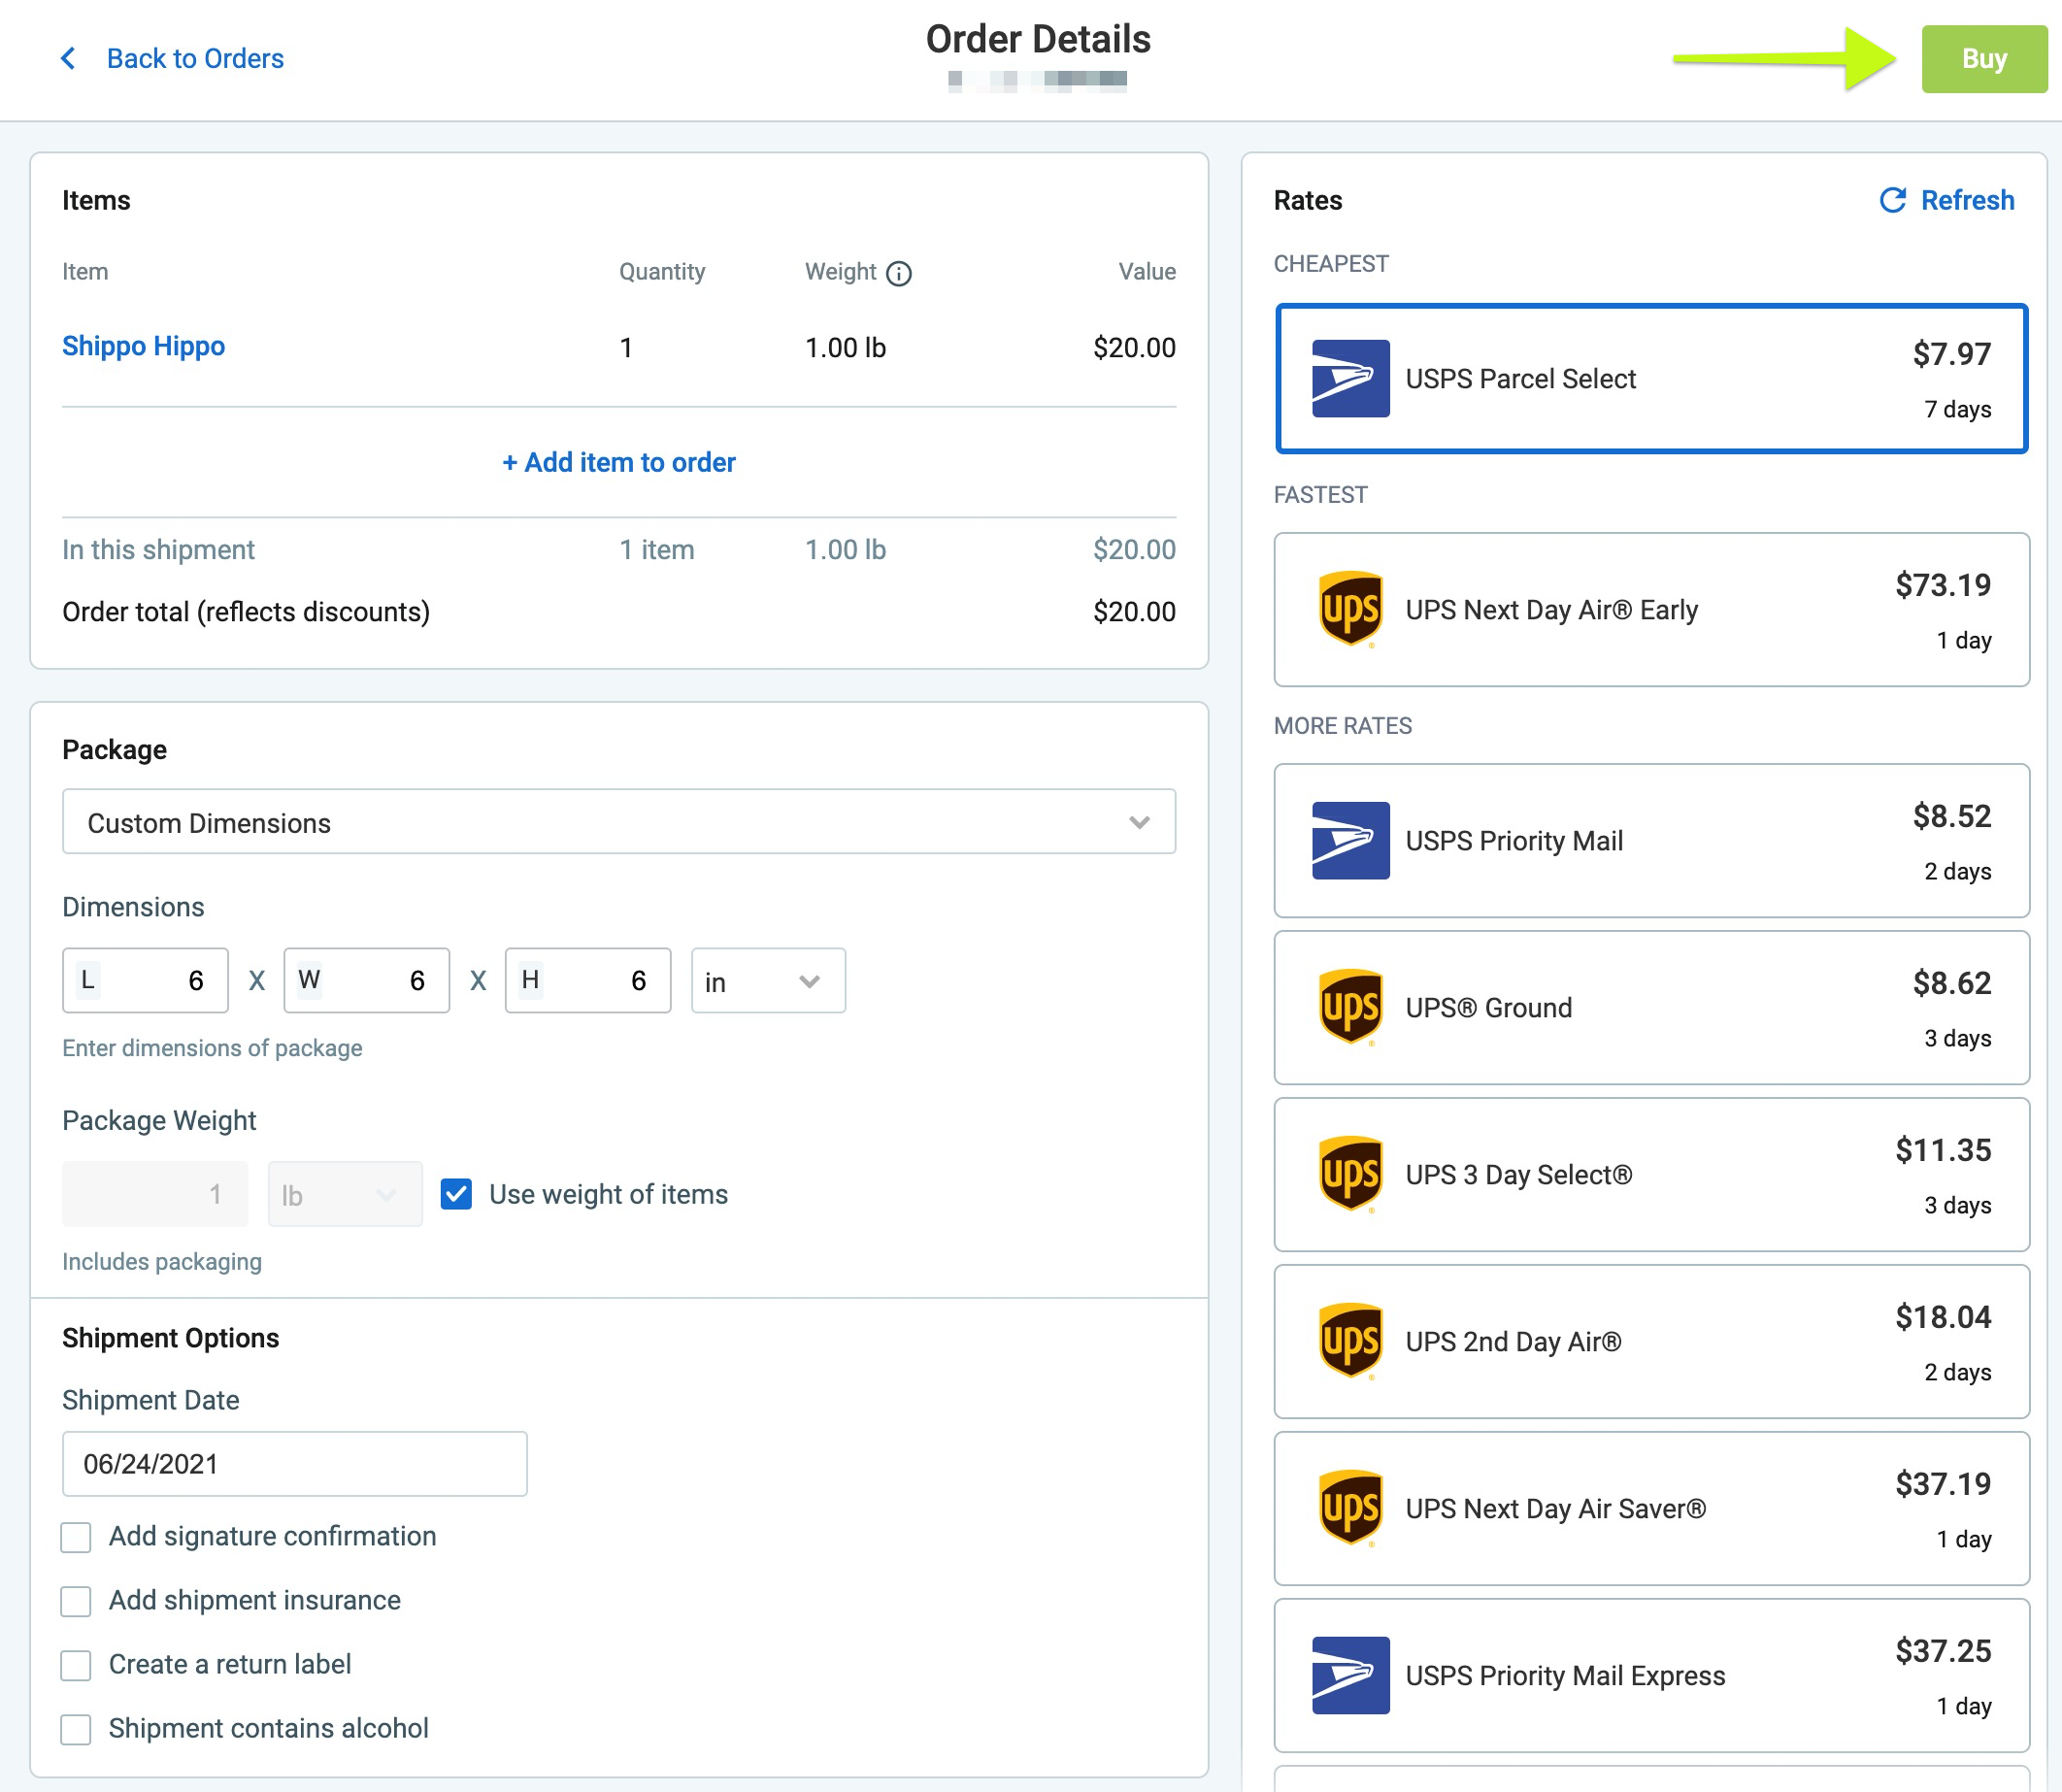
It’s finally time to start shipping those packages. At times, you may want to send a one-off package. Maybe you don’t have an online store and ship items ad hoc. Regardless of your preference, Shippo makes it easy to create one-time labels. To create a label, you’ll begin on your home page. On the “Orders” tab, you’ll see “Create Label” as a button on the top-right corner of the page. From there, your default address will be automatically populated and you’ll be able to enter your recipient’s address.
After filling out the recipient address, click “Order Details” to enter information about the item you’re shipping, along with the dimensions and weight of the package. After updating your item information and details about your package, shipping rates will populate where you can compare rates across shipping carriers. Once you’re ready to ship, click the green “Buy” button at the top right of the screen. If all looks good, click “Purchase” to buy your label.
This is just the start of your Shippo journey, but you’ll now have the tools to power your business and save money on shipping along the way. With Shippo, you will love how easy it is to ship your first package and save money shipping using the power of Shippo’s e-commerce platform.