How To Add Live Chat & Chatbots To Your Shopify Store Using Tidio App

Are you looking for a tool that would increase your customers’ satisfaction, boost sales, and is available for free? You’ve come to the right place. Tidio uniquely merges live chat, Bots, and Marketing Automation to meet the expectations of the most demanding Shopify store owners. By adding Tidio Chat to your store you empower your customers with the quickest and most effective form of contact. Research shows that live chat can boost sales by as much as 40%. Next time your customer faces an issue, they won’t go to the competitors or waste time — they’ll contact you. Let’s refer and install this great app.
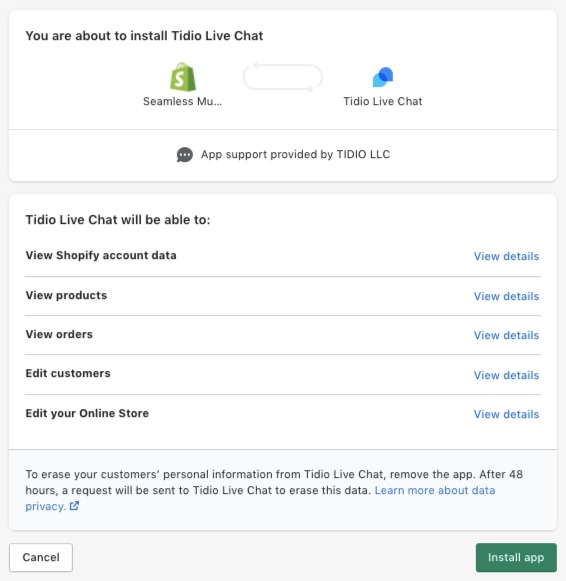
To install this app into your store, you must go to the Shopify App Store and find the Tidio Live Chat app. After going to the app’s landing page, you click on Add app (you may need to log in to Shopify if you haven’t done so) to start installing it for your Shopify store. Then you can see the app permission window. Here click on the Install app button. Tidio Live Chat will be installed on your store.
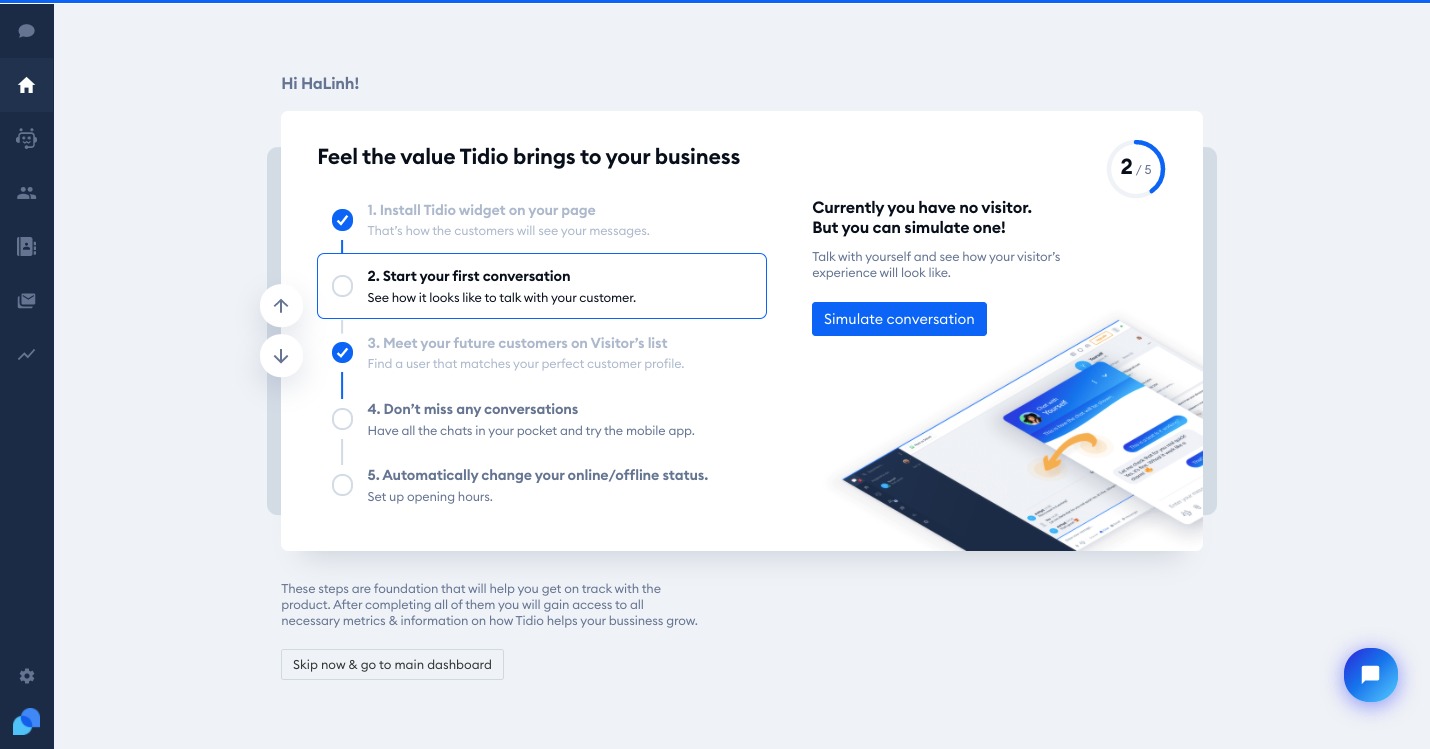
After successful installation, there will be a dashboard displayed to guide the steps to take. These steps are the foundation that will help you get on track with the product. After completing all of them you will gain access to all necessary metrics & information on how Tidio helps your business grow.
Next is the Chatbots section. The Chatbots section is the place that allows you to set up automatic responses in the chat. You can also create Chatbots, which will be able to handle the most common inquiries asked by your visitors.
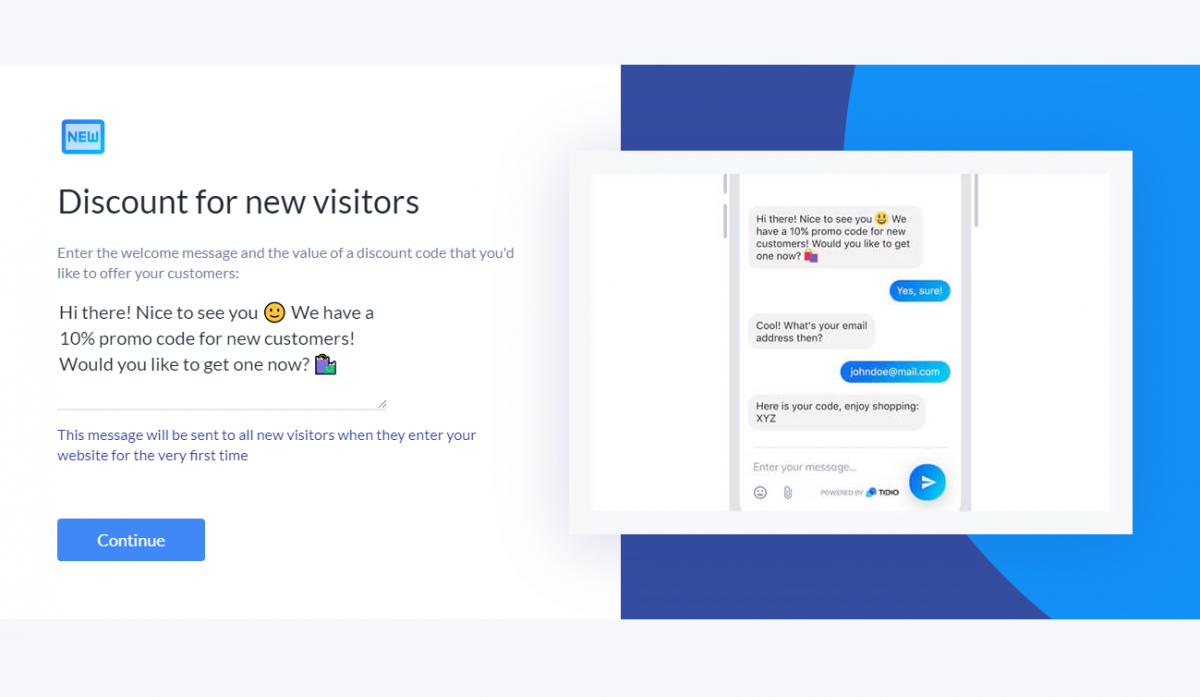
You can add the Chatbot in two ways: by using a ready template or building your very own chatbot from scratch. One of the most requested chatbots is the one that sends a custom greeting, e.g. “Hello, how can I help you?” which is triggered only once upon the first visit on the website, and it’s called “Welcome new visitors“. You can find it in the Chatbots section in your Tidio admin panel. To test it out, simply visit your website in a new Incognito window to appear as a fresh visitor.
Ready To Use Chatbots Templates
At Tidio you can use ready to use Chatbots template and just adjust the bot’s messages to your needs. If you wish to use one of the templates, you can choose one from one of three available categories: Boost Online Sales, Enhance Communication, and Generate Leads.
To view the templates, expand the categories. When you find a template you would like to use, you can test it out – this will result in a pop-up window where you can use this bot. When you decide to add the template to your bots, just click the Add this bot button. When you choose a template a quick setup tour will open. That will allow you to define the text that will be shown to the visitors. If you choose one of the Shopify-specific Bots, the system will ask to connect the Bot with your Shopify store.
Create Your Own Bot
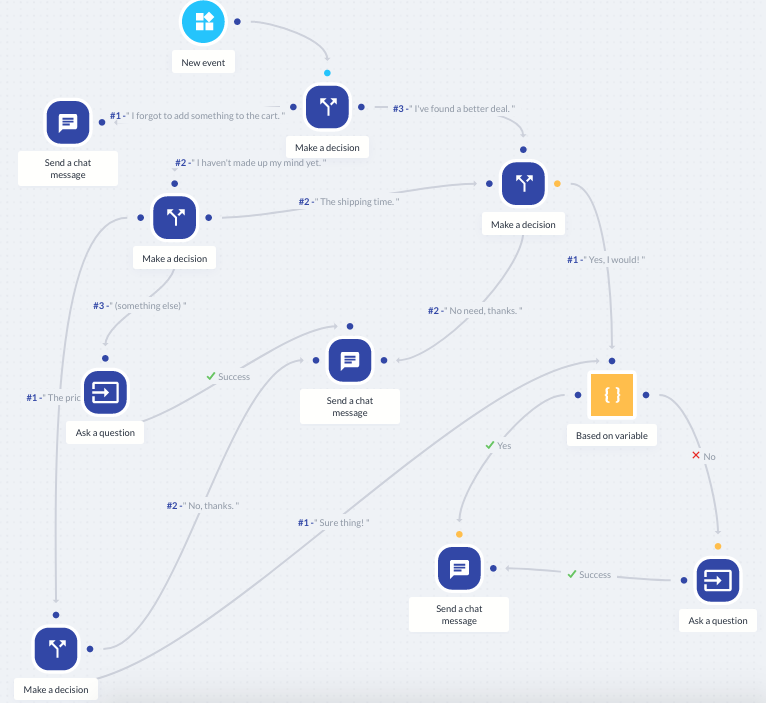
Creating a Bot manually allows you to build your own scenario using nodes, which represent the actions for a particular moment/step. This is done on a grid that allows you to add and connect all of the different nodes (triggers, conditions, and actions). It’s where you create your “map” or a “workflow”. Simply said – a chain of events that can take place on the visitor’s side. It is also known as a chatbot decision tree.
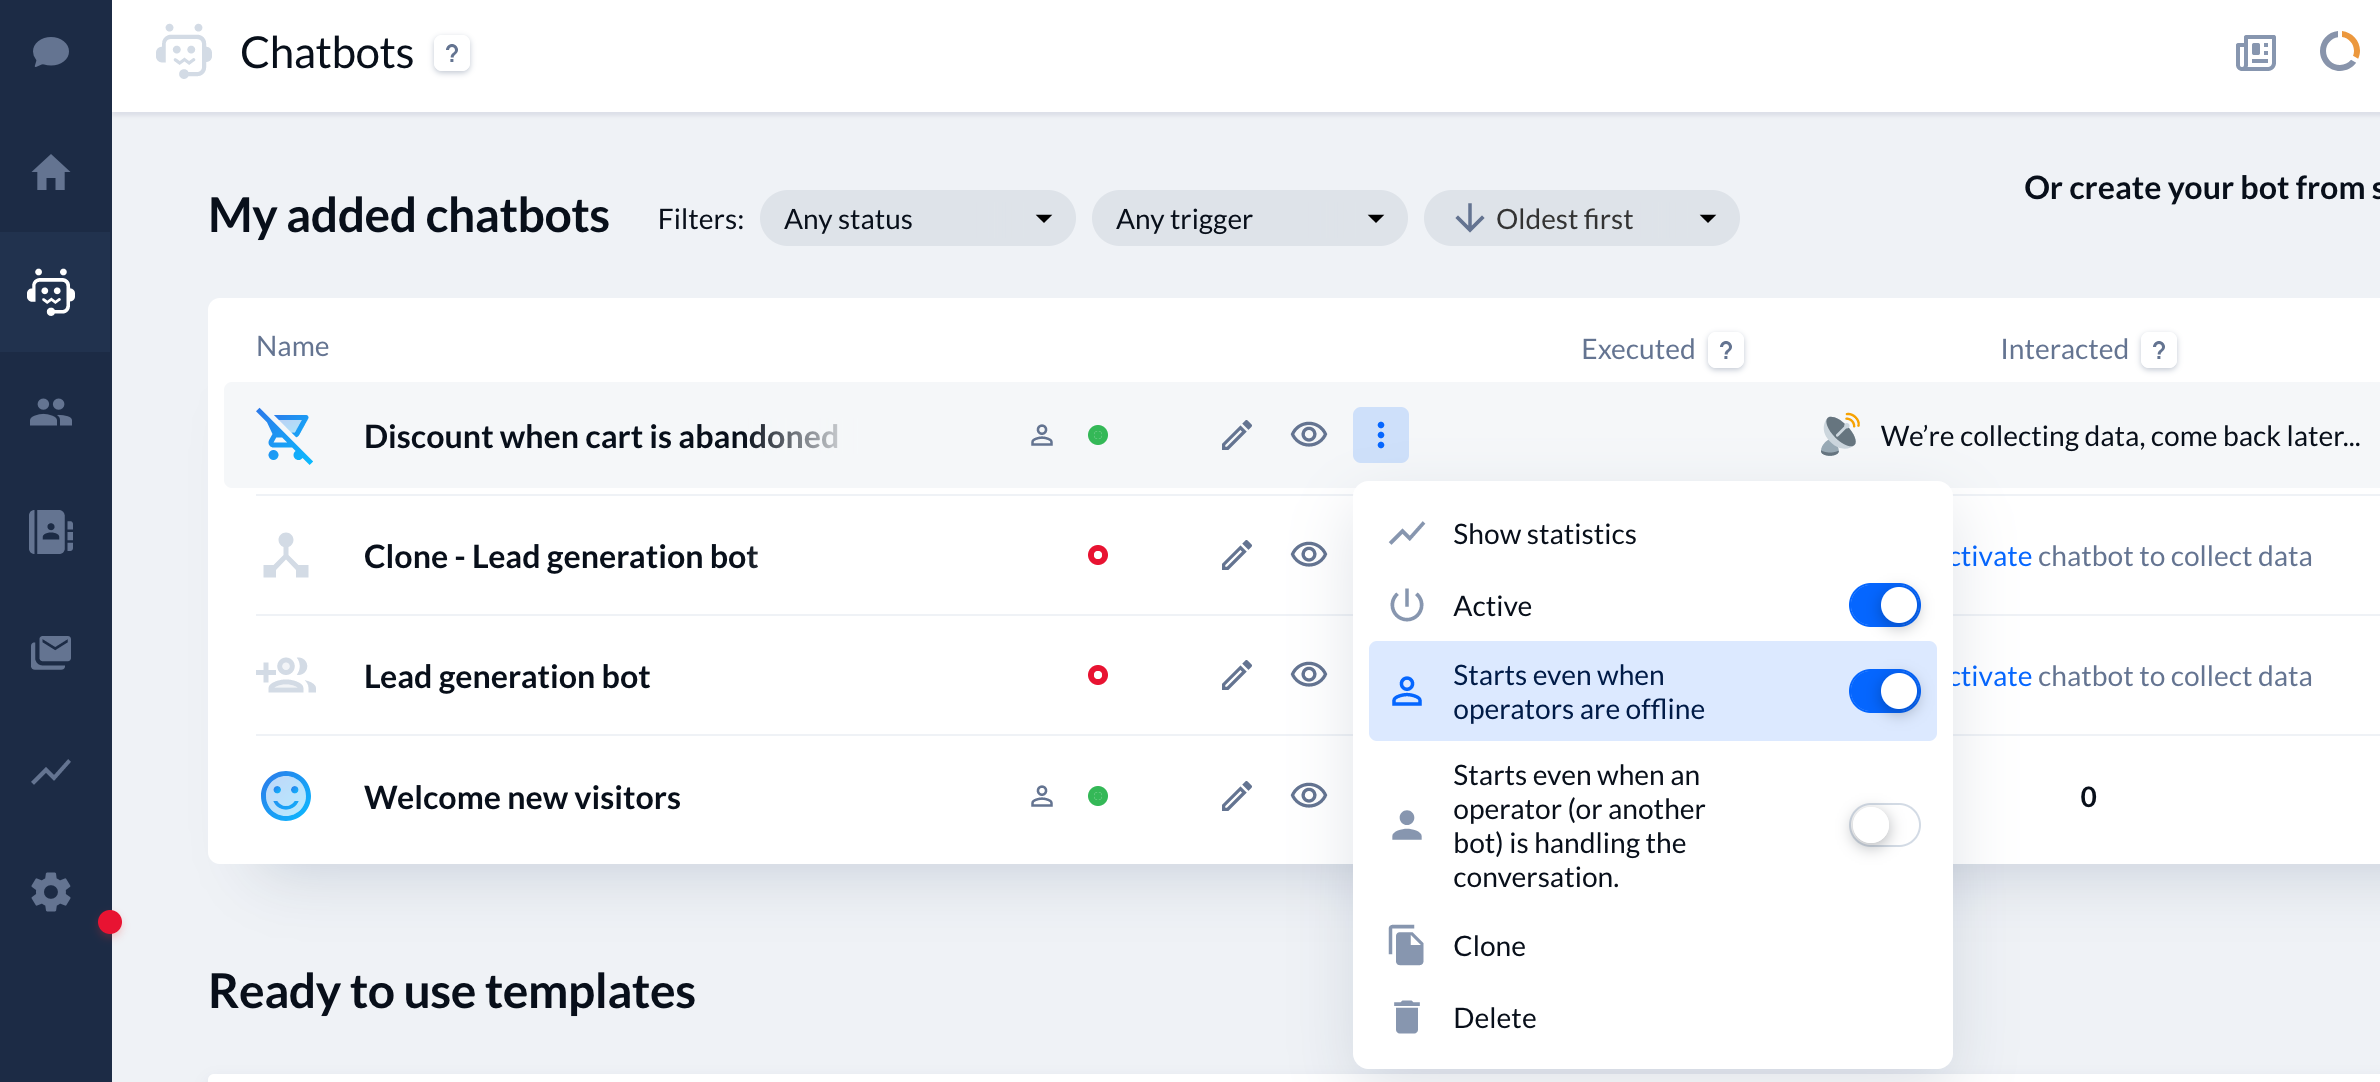
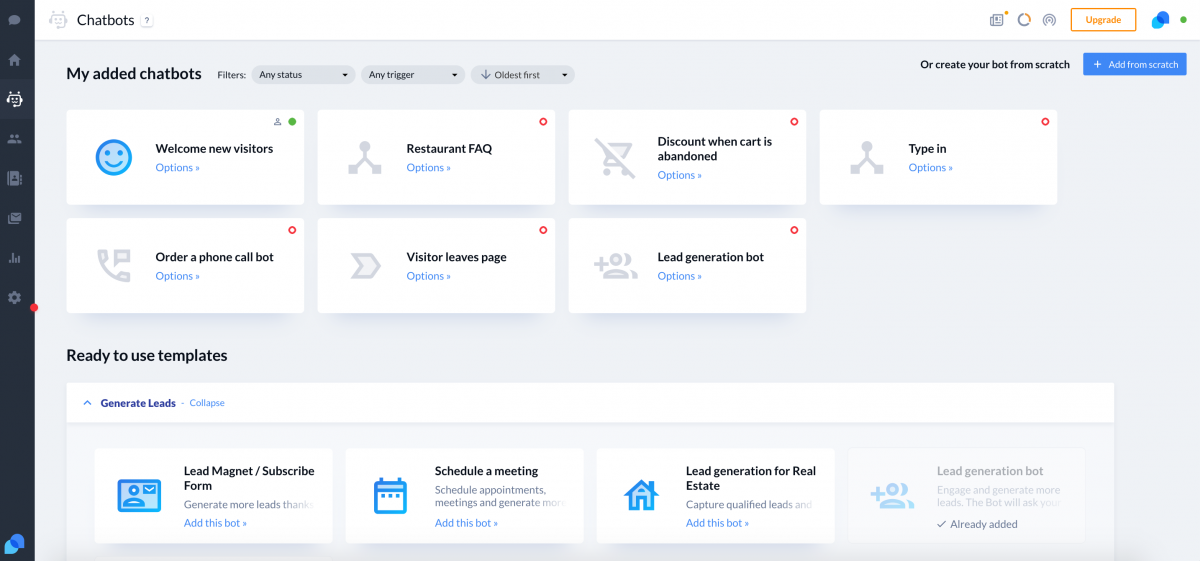
My added chatbots. This panel allows you to quickly add a bot or an automatic message, which you can choose from a list of the most common scenarios. The templates are grouped thematically – based on what they do and when they trigger.
Once you add at least one chatbot, it will be listed in the My added chatbots section. You can click the three dots button so, the Options button on the hover box of the bot to be able to show statistics, turn off, or delete the particular workflow.
Each workflow can be disabled temporarily. You can also choose if the workflow should work when none of the operators is online or – when another bot or an operator is handling the conversation. On the top of the Options list, you will find the “Show details” button – if you click on it a pop-up window will appear to the current triggers usage statistics.