
Create falling snow effect for your Shopify store

Snowfall Effect is an app in Apps store of Shopify. This app allows you to add a “falling snow” effect to your Shopify store with no coding required! It provides an easy way to add some Holiday Cheer to your Shopify powered site. The easy one click means anyone can add a “falling snow” effect. But you want to add snowfall effect to your Shopify store manually.

This article will guide for you create this effect for your store. And you can enjoy without having to pay any costs.
Here we go.
Step 1: Create a shopifytips-snowflakes snippet
- Open this Liquid code snippet.
- Select and copy all of the text.
- In a new tab, open up your shop admin.
- Go to the Edit HTML/CSS page.
- Click the Snippets folder.
- Under the Snippets folder, click Add a new snippet.
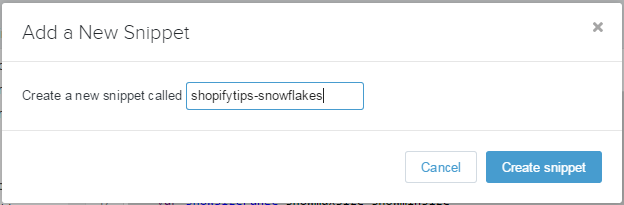
- Give your snippet the name shopifytips-snowflakes and click Create snippet.
- In the online code editor, paste the content from your clipboard.
- Click Save.
Step 2: Add to your Customize theme page
- On the Edit HTML/CSS page, locate and click Config.
- Under the Config folder, locate and click the settings_schema.json file. This will open the file in the online text editor.
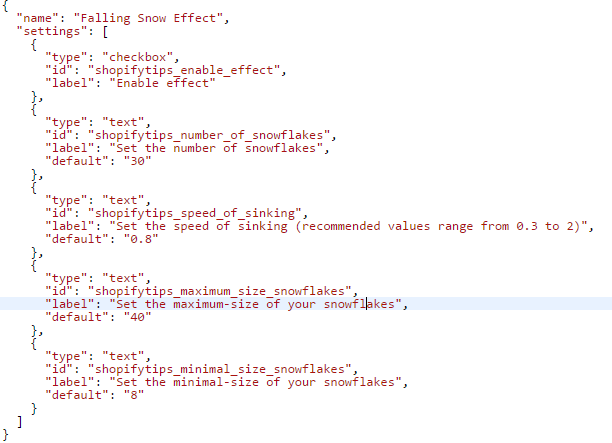
- Scroll down to the very bottom of your settings_schema.json file and add this code before the last square bracket ] and after the last curly bracket } – make sure to include that first comma , since you’re modifying a JSON data structure:
1 2 3 4 5 6 7 8 9 10 11 12 13 14 15 16 17 18 19 20 21 22 23 24 25 26 27 28 29 30 31 32 33 34 35 | , { "name": "Falling Snow Effect", "settings": [ { "type": "checkbox", "id": "shopifytips_enable_effect", "label": "Enable effect" }, { "type": "text", "id": "shopifytips_number_of_snowflakes", "label": "Set the number of snowflakes", "default": "30" }, { "type": "text", "id": "shopifytips_speed_of_sinking", "label": "Set the speed of sinking (recommended values range from 0.3 to 2)", "default": "0.8" }, { "type": "text", "id": "shopifytips_maximum_size_snowflakes", "label": "Set the maximum-size of your snowflakes", "default": "40" }, { "type": "text", "id": "shopifytips_minimal_size_snowflakes", "label": "Set the minimal-size of your snowflakes", "default": "8" } ] } |
- Click Save.
Step 3: Include the shopifytips-snowflakes snippet in theme.liquid
- Go to the Edit HTML/CSS page.
- Under the Layout folder, locate and click the theme.liquid file to open it in the online code editor.
- Look for the </body> tag and add the following code above it:
1 | {% include 'shopifytips-snowflakes' %} |
- Save your changes.
Step 4: Configure your effect
You can now configure your falling snow effect using your Customize theme page:
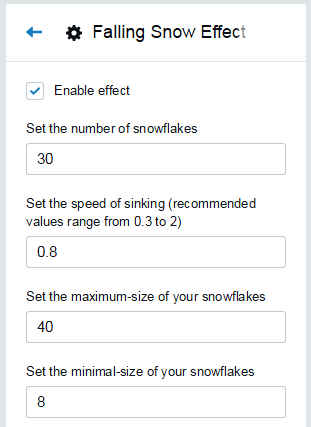
- Go to the Customize theme page.
- Configure your falling snow effect in the Falling Snow Effect section:
OK. Now you can access your site for check.
Falling snow effect demo
This demo shop has a falling snow effect.
If you get stuck in the process of work you can contact me to get help or hired me to do that.


Work!, very nice, thanks, but can I change the snowflakes shape and look?
the snowflakes tool works on the web but leaves a weird black snowflake at the top left corner of every page, which causes problem when open a new link/page. To open a new link, now I have to click on the link and refresh it once more to make it appear, otherwise it’s show an empty page, why is that? any way to fix it?
I don’t know because on my site. It’s OK. You can see demo site. Maybe they have conflict with something.
that weird white space also showing on your demo website.
Hi! I just installed and enabled it, but now the Olark Chat won’t pop up! 🙁
Any way to fix it?
Yes, I checked. This issue have reason by a variable in my code is duplicate with a variable in Olark code. Fix:

– Open: shopifytips-snowflakes.liquid
– In line: 30, 31, 39. You must change name of variable “opera” to “br_opera”
– Save and check again.
Thanks
Very cool!!!!
How can I change the flakes to hearts?
Yes, you can. In shopifytips-snowflakes.liquid file:
– Inline 11 change:
var snowcolor=new Array(“#aaaacc”,”#ddddff”,”#ccccdd”,”#f3f3f3″,”#f0ffff”);
to
var snowcolor=new Array(“red”);
– And inline 13 change:
var snowletter=”*”;
to
var snowletter=”♥”;
Done!
I just want to say that this page has helped me so much. Thank You
Excellent Thank you so much for such an easy tutorial you are the best.
Thanks for this tutorial! Super easy to follow, worked no problem!!
Hi, Just installed it and it works perfectly. Two questions:
1) How can I make the effect visible only on my front page?
2) Could I make it visible only 30 seconds?
Thank you in advance,
N.
Hi Nat,
Yes, you can to do that.
1. In step 3, replace the code to
{% if template contains 'index' %}{% include 'shopifytips-snowflakes' %}{% endif %}2. You can add the below javacscript code in theme.liquid file:
<script>setTimeout(function(){for (i = 0; i < 20; i++) {var snow = document.getElementById('s'+i);snow.parentNode.removeChild(snow);}, 30000);</script>I hope it's helpful for you.
Hi Kiet,
I don’t know if this is still valid. I want to set a time of 30 seconds and add the following code before in theme.liquid, but it does not work. Can you help? Any information that you can provide would be greatly appreciated. Thank you in advance for your help.
setTimeout(function(){for (i = 0; i < 20; i++) {var snow = document.getElementById('s'+i);snow.parentNode.removeChild(snow);}}, 30000);
1 worked like a charm!
2 unfortunatelly didn’t stop the effect on 30seconds 🙁
Any specific on where to place it on theme.liquid?
Thank you,
N.
Wow such a cool feature
Your instructions are also extremely clear so thank you so so much for sharing this info!
Unable to see on my site. Did the exact step by step thing. Can you please help. Thanks again!