How To Make Your Products Pop With Unique Labels Using Smartify Product Labels app

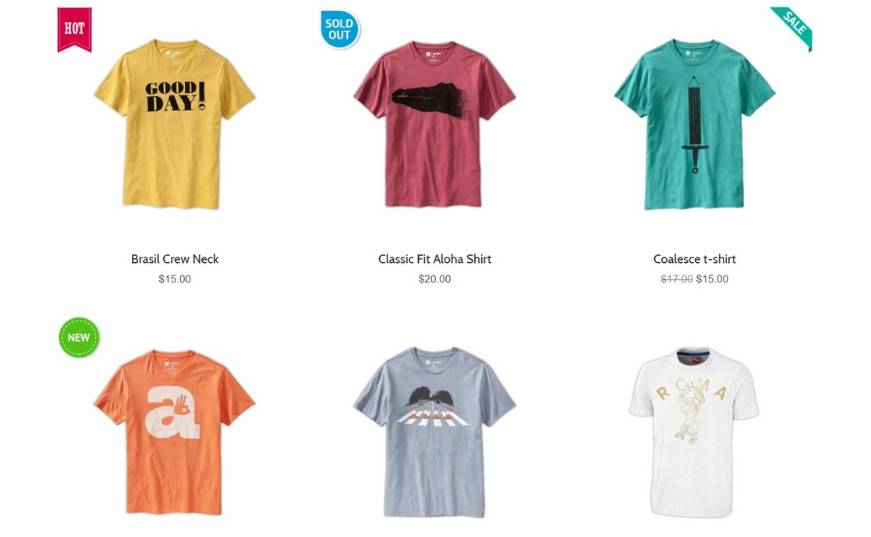
According to survey data, the average attention span of a shopper is 5 to 8 seconds. That’s all the time you have to capture their attention. So how to do that? This article will guide you on the way to install and set the product labels app for your Shopify store. This way is simple but very effective. This powerful app allows you to add different kinds of visual-appealing labels, badges, and stickers in various customized conditions. With the special labels on your product images, you can easily grab customer’s attention by highlighting your “ON SALE”, “BESTSELLER”, “NEW” products!
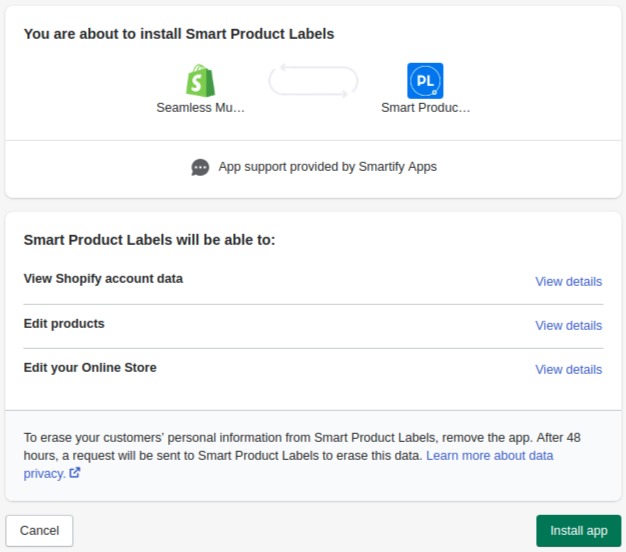
Begin by installing the app from the Shopify apps store. Search “Smartify Product Labels” app and click Add app. After that, to install just click on Install App.
There are 5 steps to create product labels:
Step 1: Setting up if Labels are for New, On Sale, or Low Stock products
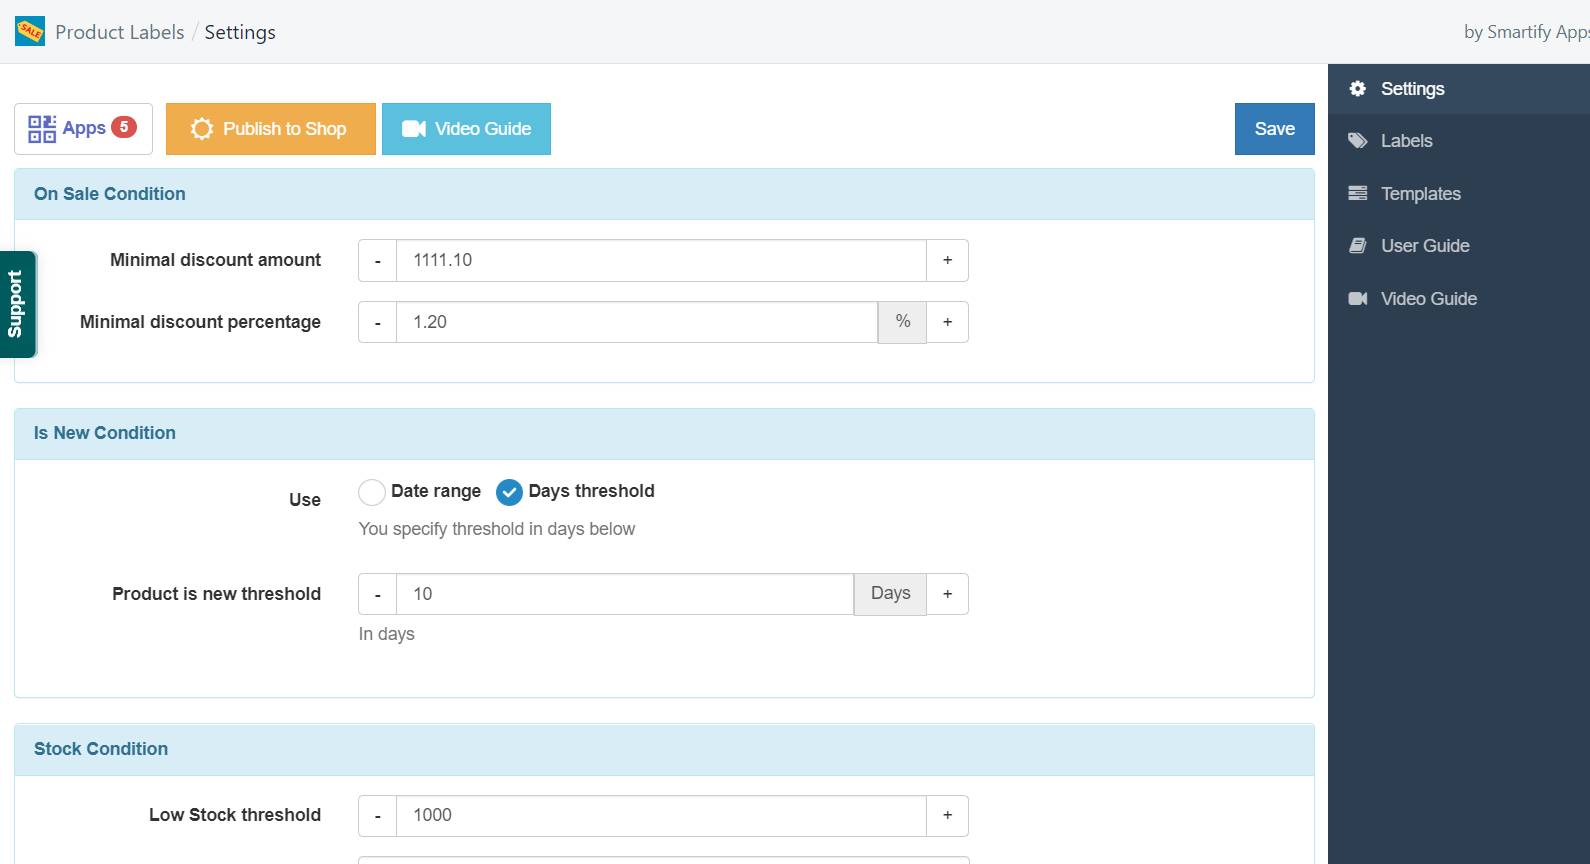
On Sale Condition panel: Conditions you fill in this panel determine which products are “On Sale” to label. It means products that meet these conditions are “On sale” products. You need to specify the minimal discount amount or minimal discount percentage.
In New Condition panel: Similarly, conditions you fill in this panel determine which products are “New” to label. It means products that meet conditions are “New” products.
You can select Date Ranges or Day Threshold. With Date Ranges, if products are created during this time range, products are new. With Day Threshold, it is the number of days since products are created and during these days, products are new.
Stock Condition Panel: For Low Stock Label, you need to specify the Low Stock Threshold. When product inventory decreases to this threshold, it is the low-stock product.
Step 2: Adding a Label
In this step, you can create as many labels as you want. To add a label, please go to the Labels > click Add Label. Then you will see as below screenshot:
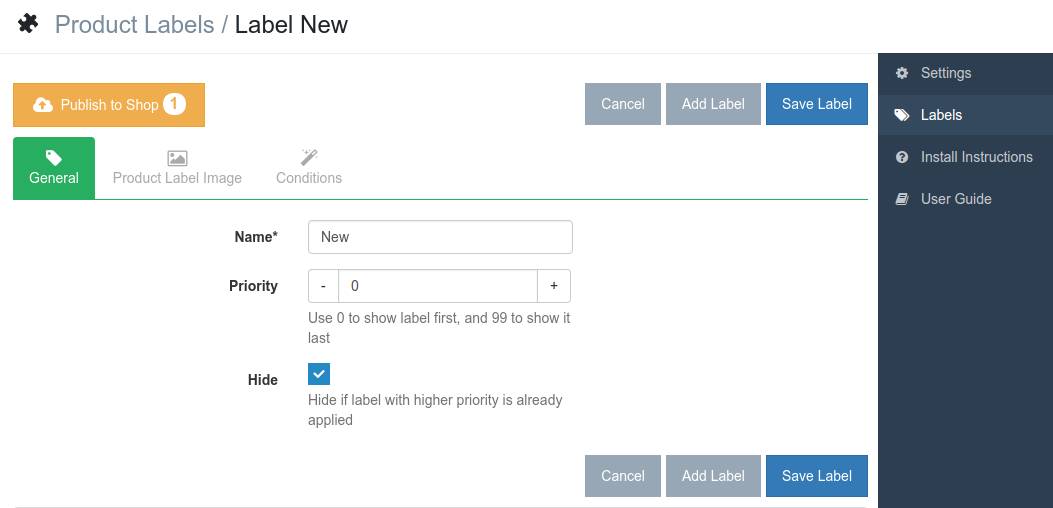
Name: Enter the name of the label.
Priority: If you use multiple product labels, please set up priority for them. The lower number has a higher priority, which will display first. For example, one product meets conditions of both On Sale Label and New Label, if you don’t set up priority, 2 labels will be displayed. If you set up priority for on Sale Label = 1 and New Label = 2, it will display the On Sale label on that product.
Hide: Tick the Hide box to make the priority feature above work. These two parts need to combine to make priority work.
When all fields are done, click Save Label
Step 3: Adding an image for the Label
After clicking Save Label, please go to the next tab: “Product Label Image”. Now you can add an image for your Label
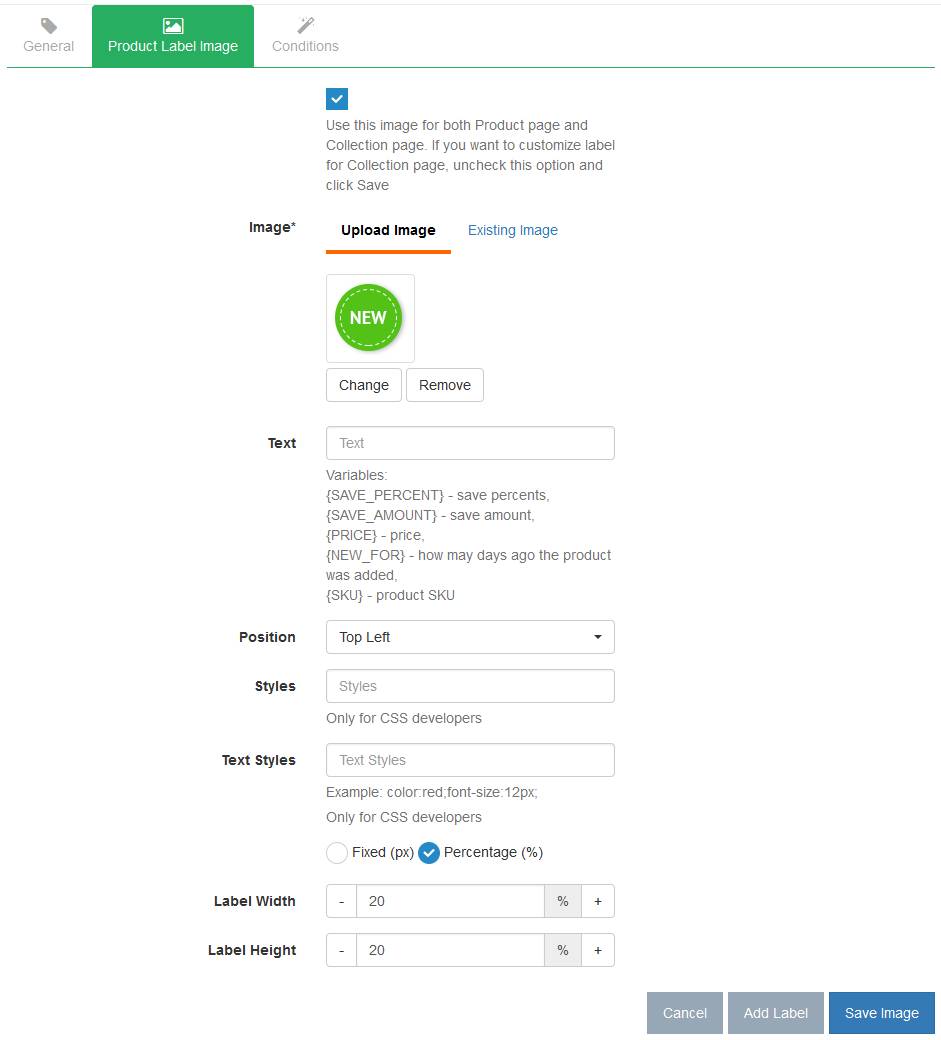
The first checkbox: Tick this box to use this image for both the Product page and the Collection page. If you want labels on these pages to be different, uncheck this option and click Save.
Text on label image: The text you want to show on the label image. If your label is just general such as “Sale”, “New”, “Hot”, you don’t need to use this feature. Text on label image is used for a blank label image (without text). Normally, it is used when you want to have variable text automatically on the label image depending on a certain product.
For example: If you want to show text on sale products, with the value of sale automatically calculated, you can enter: Save {SAVE_PERCENT} %. Then on front-end it will be shown: Save 20%, Save 30%…
Image of label: The image of the label
Label Position: Label Position is the position of the label on the product image
Label Styles: You can customize the styles of the label. This part is for CSS experts only as it needs coding.
Text Styles: You can customize the styles of the text that you enter in the “Text on label image” field.
Label Width/Height: You can enter the percent of the product image. Example: 20 means the label will equal 20% of the product image
Don’t forget to click Save Image when all are done for this step.
Step 4: Setting up conditions for the label
After saving the image for your label, please go to the tab “Conditions”
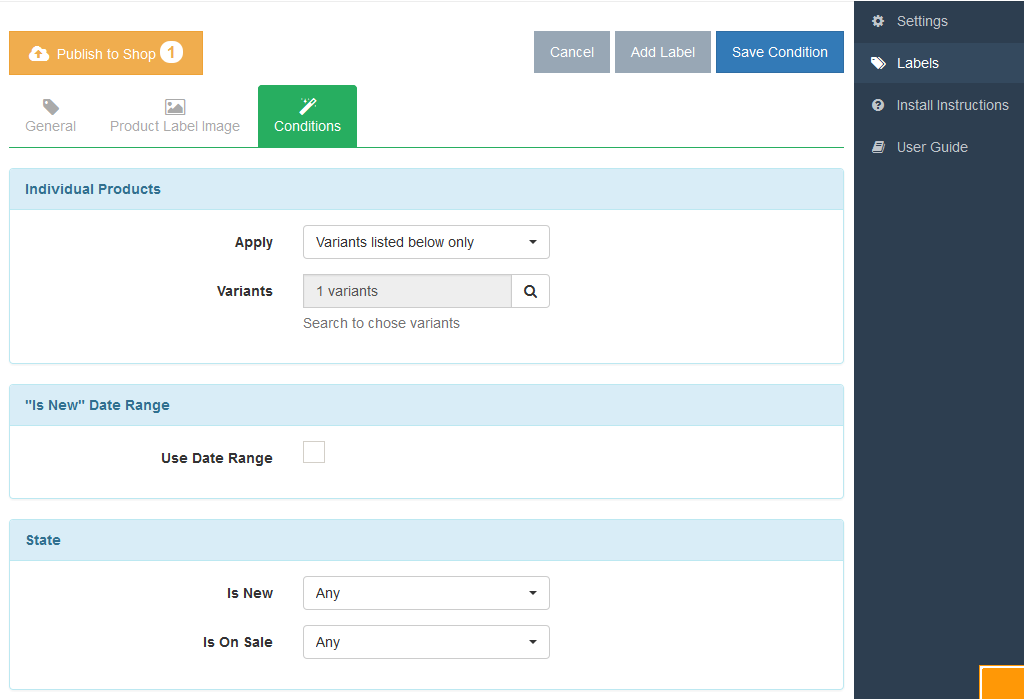
Well, this is the most important part of all so please read this part carefully.
Individual Products: This section helps you to select rules for applying the label. In this section, you have 3 options to choose:
- All matching products and variants listed below: If you select this option, the label will be shown for products that have variants specified in this section plus all products that meet conditions specified in the below sections: “Is New Date Range”, “State”, “Stock”, “Collection”, “Price Range”.
- All matching products except variants listed below: If you select this option, the label will be shown for all products that meet conditions specified in the below sections: “Is New Date Range”, “State”, “Stock”, “Collection”, “Price Range”, except variants listed in this section.
- Variants listed below only: If you select this option, the label will be shown for all products that have variants listed in this section.
Is New Date Range: Tick if you want the label to be shown for products that are in a date range. If the labels are not for NEW products, skip this.
State: This section helps you categorize which product labels are shown based on the “New” and “On Sale” status of the products.
In Is New:
- Yes: means the label will be shown for new products.
- No: means the labels will be shown for products that are not New.
- Any: means the labels will be shown for all products.
In is On Sale:
- Yes: means the label will be shown for on-sale products.
- No: means the label will be shown for products that are not On Sale.
- Yes: means the label will be shown for all products.
If labels are not for New or On sale products, skip this.
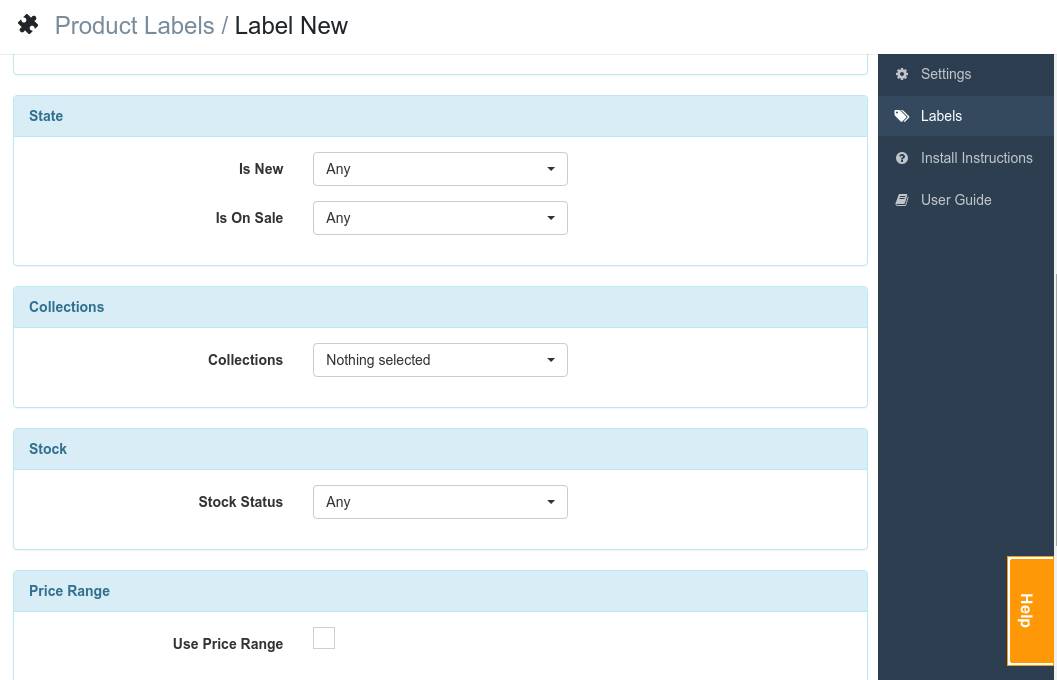
Collection: You can restrict to show labels by collections.
Stock: You can show labels for Instock or Out of stock products. There are 4 options:
- In stock: the labels will be shown for products that are in stock.
- Low stock: the labels will be shown for products, of which inventory decreases to the low stock threshold you set up in Step 1.
- Out of stock: the label will be shown for products that are out of stock.
- Any: the label will be shown for all products.
Price Range: If you enter a price range, the label will be shown for products that are in this range only.
Step 5: Publishing the created labels
Click Publish to Shop button and go to your front-end to see how the Labels be shown.
This feature will work in your store.